Home > Single Recipes > Dripping Sandwiches: Relive History with Authentic WW2 Recipe
Last Updated: February 8, 2025
I Made These FREE Vintage Recipe Tools JUST For You
This recipe was created with help from AI tools and carefully reviewed by a human. For more on how we use AI on this site, check out our Editorial Policy. Classic Fork earns a small commission from Amazon and other affiliate links at no extra cost to you, helping us keep our content free and honest.
Dripping Sandwiches: Relive History with Authentic WW2 Recipe
Time Period:
Meal Type:
Cooking Time: 15 minutes
Prep Time: 10 minutes
Total Time: 25 minutes
Servings: 4 sandwiches
Calories: Approximately 300 kcal per serving
During the austerity of World War II, resourcefulness in the kitchen was not just encouraged—it was essential. One of the ingenious creations from this era is the Dripping Sandwich, a humble yet hearty meal that made the most of limited ingredients.
Today, we revisit this classic British staple, celebrating its simplicity and rich history. Whether you’re a history buff, a culinary enthusiast, or someone looking to try something new, this recipe offers a taste of resilience and tradition.

What Would You Cook in Wartime?
Step back in time and discover what you could make with limited wartime rations
History
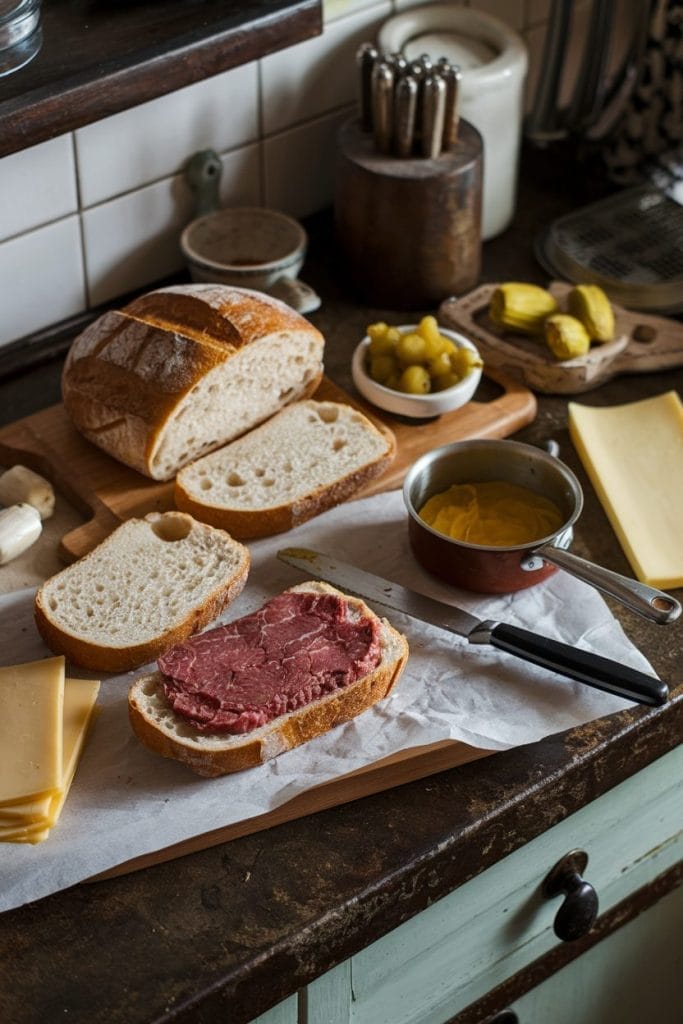
The Dripping Sandwich emerged in Britain during the Second World War, a time marked by rationing and scarcity. With meat consumption limited, households had to find alternative uses for every part of the animal. Beef dripping, the fat rendered from roasting beef, became a valuable resource.
It was used not only for cooking but also as a flavorful spread for sandwiches. This economical and tasty solution provided sustenance to many families, embodying the spirit of ingenuity that defined the wartime era.
Equipment
To recreate this historical delicacy, you’ll need the following equipment:
- Bread Toaster or Oven: For toasting the bread to perfection.
- Butter Knife (Chefs envy this knife set): To spread the dripping evenly.
- Small Saucepan (this is the FATHER of all saucepans!): If you’re rendering your own beef dripping.
- Measuring Spoons: To ensure accurate ingredient proportions.
- Spatula: For stirring and handling the dripping.
- Cutting Board (My favorite cutting board set) and Knife: For preparing any additional fillings or garnishes.
My Recommendations
All-Clad Stainless Steel Roasting Pan with Rack – This premium roasting pan ensures even cooking for your meat, making it tender and flavorful. The included rack allows for proper air circulation, helping to achieve the perfect drippings.
Wüsthof Classic 8-Inch Chef’s Knife – Slice through your roast effortlessly with this professional-grade chef’s knife. Its razor-sharp edge and balanced design make it a must-have for any serious home cook.
Ingredients
Gather the necessary ingredients to make four delicious Dripping Sandwiches:
- 8 slices of sturdy bread (such as wholemeal or white)
- 4 tablespoons of beef dripping (store-bought or homemade)
- Salt and pepper to taste
- Optional fillings: Sliced cheese, pickles, or mustard for added flavor
- Butter (optional, for extra richness)
Instructions
1. Prepare the Beef Dripping
If you’re making your own beef dripping, start by rendering the fat:
- Heat a small saucepan over low heat.
- Add beef fat and gently melt it, stirring occasionally.
- Once fully melted, strain out any solids and set aside to cool slightly.
2. Toast the Bread
Achieve the perfect crunch for your sandwich:
- Preheat your toaster or oven to medium-high.
- Place the bread slices on a baking tray if using an oven.
- Toast the bread until golden brown, flipping if necessary. Remove and let cool slightly.
3. Spread the Dripping
Add rich flavor to your sandwich:
- Use a butter knife to evenly spread a tablespoon of beef dripping on each slice of toasted bread.
- Season lightly with salt and pepper to taste.
4. Add Optional Fillings
Customize your sandwich to your preference:
- Layer on any optional fillings, such as a slice of cheese or a dollop of mustard.
- Top with the second slice of bread, dripping side down.

5. Serve and Enjoy
Present your historical creation:
- Cut the sandwich diagonally or in halves for easier handling.
- Serve immediately while the bread is still warm and crispy.
Special Notes
- Homemade Dripping: For a more authentic experience, rendering your own beef dripping can enhance the flavor. Ensure to strain out any impurities for a smooth spread.
- Bread Selection: Choosing a hearty bread helps support the richness of the dripping. Wholemeal bread adds a nutty flavor and extra nutrients.
- Storage: Dripping sandwiches are best enjoyed fresh. If storing, keep the dripping separate until ready to assemble to prevent the bread from becoming soggy.
- Vegetarian Option: Substitute beef dripping with a plant-based spread, such as olive oil mixed with herbs, for a vegetarian-friendly version.
Nutrition
Per Serving (1 Sandwich):
- Calories: 300 kcal
- Protein: 8g
- Carbohydrates: 30g
- Fats: 18g
- Fiber: 2g
- Sodium: 350mg
Note: Nutritional values may vary based on specific ingredients and portion sizes.

Dripping Sandwiches From The World War 2
The Dripping Sandwich, popular in Britain during World War II, was a resourceful wartime meal where beef dripping was used as a flavorful spread due to meat rationing.
Ingredients
- 8 slices of sturdy bread (such as wholemeal or white)
- 4 tablespoons of beef dripping (store-bought or homemade)
- Salt and pepper to taste
- Optional fillings: Sliced cheese, pickles, or mustard for added flavor
- Butter (optional, for extra richness)
Instructions
1. Prepare the Beef Dripping
If you’re making your own beef dripping, start by rendering the fat:
- Heat a small saucepan over low heat.
- Add beef fat and gently melt it, stirring occasionally.
- Once fully melted, strain out any solids and set aside to cool slightly.
2. Toast the Bread
Achieve the perfect crunch for your sandwich:
- Preheat your toaster or oven to medium-high.
- Place the bread slices on a baking tray if using an oven.
- Toast the bread until golden brown, flipping if necessary. Remove and let cool slightly.
3. Spread the Dripping
Add rich flavor to your sandwich:
- Use a butter knife to evenly spread a tablespoon of beef dripping on each slice of toasted bread.
- Season lightly with salt and pepper to taste.
4. Add Optional Fillings
Customize your sandwich to your preference:
- Layer on any optional fillings, such as a slice of cheese or a dollop of mustard.
- Top with the second slice of bread, dripping side down.
5. Serve and Enjoy
Present your historical creation:
- Cut the sandwich diagonally or in halves for easier handling.
- Serve immediately while the bread is still warm and crispy.
Notes
- Homemade Dripping: For a more authentic experience, rendering your own beef dripping can enhance the flavor. Ensure to strain out any impurities for a smooth spread.
- Bread Selection: Choosing a hearty bread helps support the richness of the dripping. Wholemeal bread adds a nutty flavor and extra nutrients.
- Storage: Dripping sandwiches are best enjoyed fresh. If storing, keep the dripping separate until ready to assemble to prevent the bread from becoming soggy.
- Vegetarian Option: Substitute beef dripping with a plant-based spread, such as olive oil mixed with herbs, for a vegetarian-friendly version.
Nutrition Information
Yield 4 Serving Size 1 sandwichAmount Per Serving Calories 300Total Fat 18gSodium 350mgCarbohydrates 30gFiber 2gProtein 8g
Nutritional values may vary based on specific ingredients and portion sizes.

Maggie Hartwell
Hi there, I’m Maggie Hartwell, but you can call me Maggie—the apron-clad foodie behind Classic Fork! I created Classic Fork because I’m convinced food has a way of telling stories that words can’t. So, grab a fork and dig in. The past never tasted so good!